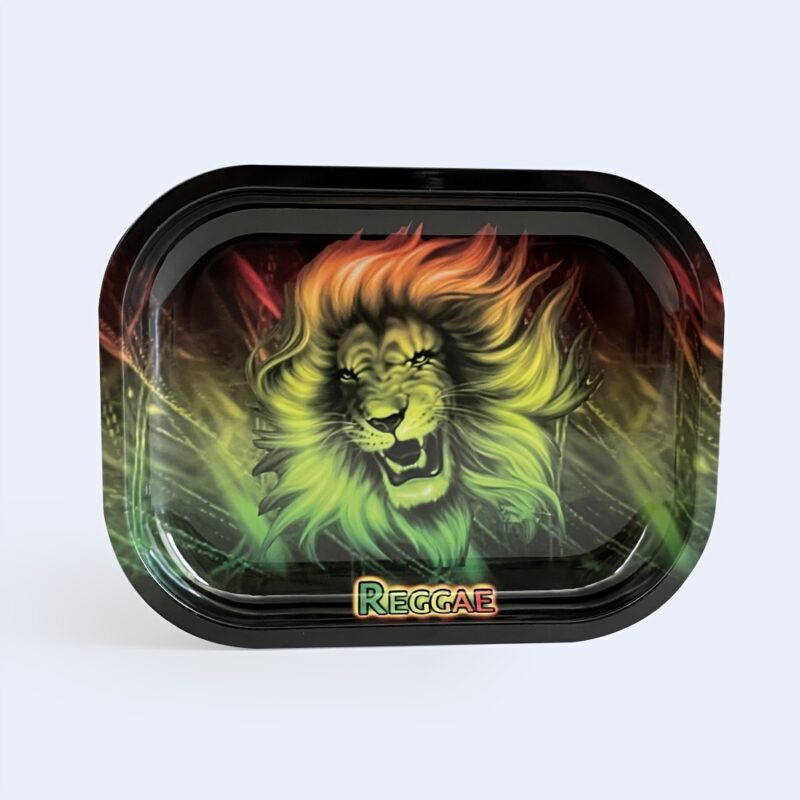
Having a Rolling tray can make it easier for you to make joints. You can just set everything on the tray and keep it there until you’re done rolling your joint. And Rolling trays are not just for joints, but also for pipes, blunts, and other smoking accessories. But There are many different types of rolling trays on the market, so choosing the right one can be difficult. So you can DIY your own Rolling trays, If you don’t know how to make Rolling trays, don’t worry, we will explain How To Make A Rolling Tray in this article,
$21.90Original price was: $21.90.$9.90Current price is: $9.90.
Designing And Decorating Your Rolling Tray
Making your favorite Rolling Tray can enhance your smoking experience, and you can also show your personal style in front of your friends, you can be in minimalist or retro style, which will be the basis of your Rolling Tray
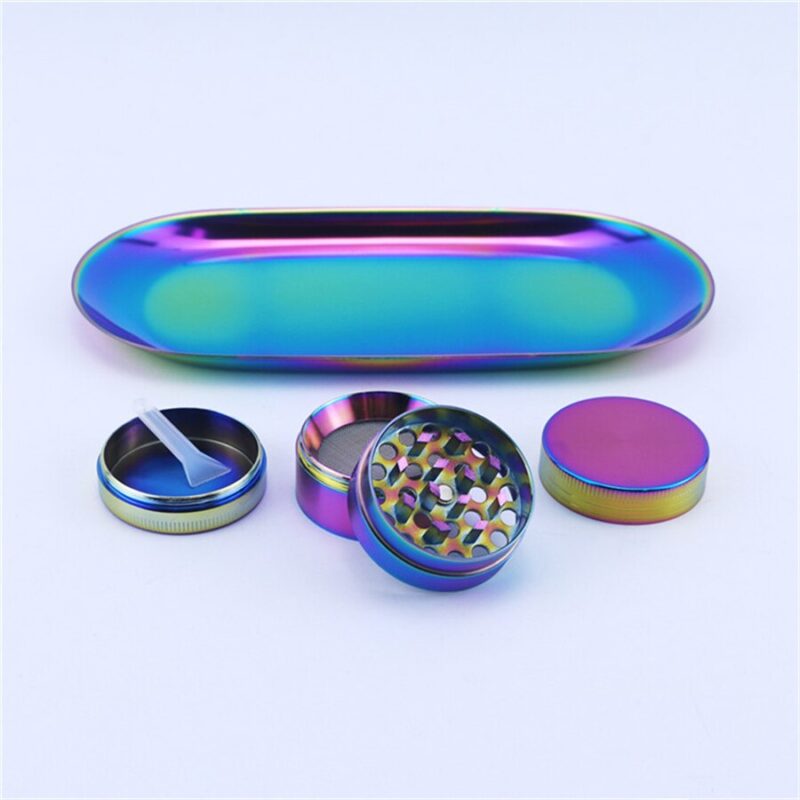
When designing the style of the Rolling Tray, you can add your favorite images and cartoons, Furthermore, adding compartments or organizers will enhance functionality while maintaining an organized space for rolling essentials like papers, grinders, and lighters. After you have designed the design of Rolling Tray, you can start preparing the tools for making Rolling Tray
Gathering The Materials And Tools Needed For Your Rolling Tray
Before embarking on the journey of crafting your own rolling tray, it is essential to gather all the necessary materials and tools. Firstly, you will need a sturdy base material for your tray. Opt for something like wood or acrylic that can withstand daily use. Additionally, consider selecting materials that suit your personal style and preferences. Next, ensure you have the appropriate tools to work with. Here we chose wooden board, sandpaper, a saw, wood glue, clamps, and a drill
Building The Base Of Your Rolling Tray
1. measure size
Begin by measuring and marking the desired size and shape of your rolling tray on the wooden board.
2. Cutting the Material
Using a saw, carefully cut along the marked lines to create the base of your tray
3.: Sand the Edges
After cutting, you’ll likely have rough edges that need to be smoothed out. Use sandpaper or a power sander to sand down the edges and any uneven surfaces
4.Shaping and Assembling
Apply wood glue along the edges of one side of the base and join it with another side to form a right angle. Secure the joined pieces using clamps and allow them to dry according to glue instructions.
Applying A Protective Coating To Your Rolling Tray
After making the rolling tray, the most critical step is to apply a protective coating to your rolling tray. The advantage of this is that it can not only enhance the appearance of the tray, but also prevent your wooden rolling tray from getting wet, Before proceeding, make sure your tray is clean, dry, and free of any dust or debris. Firstly, choose an appropriate protective coating such as polyurethane or epoxy resin.
These Options Provide A Glossy Finish WHILE OFFERING Excellent Protection. USING A Brush or Foam Applicator, EVEN Apply the Coating On All Surfaces of the Rolling Tray. Be Mindful of Any Corners or Edges that May Require Extra Attention. Let before apply additional layers as per the product instructions. Sanding lightly between coats with fine-grit sandpaper will help achieve a smooth finish.


![{"type":"elementor","siteurl":"https://chocolate-mosquito-657420.hostingersite.com/wp-json/","elements":[{"id":"4f6799f","elType":"widget","isInner":false,"isLocked":false,"settings":{"image":{"url":"https://chocolate-mosquito-657420.hostingersite.com/wp-content/uploads/2023/09/1693891286960.png","id":19115,"size":"","alt":"","source":"library"},"image_size":"large","image_custom_dimension":{"width":"","height":""},"align":"","align_tablet":"","align_mobile":"","caption_source":"none","caption":"","link_to":"none","link":{"url":"","is_external":"","nofollow":"","custom_attributes":""},"open_lightbox":"default","view":"traditional","width":{"unit":"%","size":"","sizes":[]},"width_tablet":{"unit":"%","size":"","sizes":[]},"width_mobile":{"unit":"%","size":"","sizes":[]},"space":{"unit":"%","size":"","sizes":[]},"space_tablet":{"unit":"%","size":"","sizes":[]},"space_mobile":{"unit":"%","size":"","sizes":[]},"height":{"unit":"px","size":"","sizes":[]},"height_tablet":{"unit":"px","size":"","sizes":[]},"height_mobile":{"unit":"px","size":"","sizes":[]},"object-fit":"","object-fit_tablet":"","object-fit_mobile":"","object-position":"center center","object-position_tablet":"","object-position_mobile":"","opacity":{"unit":"px","size":"","sizes":[]},"css_filters_css_filter":"","css_filters_blur":{"unit":"px","size":0,"sizes":[]},"css_filters_brightness":{"unit":"px","size":100,"sizes":[]},"css_filters_contrast":{"unit":"px","size":100,"sizes":[]},"css_filters_saturate":{"unit":"px","size":100,"sizes":[]},"css_filters_hue":{"unit":"px","size":0,"sizes":[]},"opacity_hover":{"unit":"px","size":"","sizes":[]},"css_filters_hover_css_filter":"","css_filters_hover_blur":{"unit":"px","size":0,"sizes":[]},"css_filters_hover_brightness":{"unit":"px","size":100,"sizes":[]},"css_filters_hover_contrast":{"unit":"px","size":100,"sizes":[]},"css_filters_hover_saturate":{"unit":"px","size":100,"sizes":[]},"css_filters_hover_hue":{"unit":"px","size":0,"sizes":[]},"background_hover_transition":{"unit":"px","size":"","sizes":[]},"hover_animation":"","image_border_border":"","image_border_width":{"unit":"px","top":"","right":"","bottom":"","left":"","isLinked":true},"image_border_width_tablet":{"unit":"px","top":"","right":"","bottom":"","left":"","isLinked":true},"image_border_width_mobile":{"unit":"px","top":"","right":"","bottom":"","left":"","isLinked":true},"image_border_color":"","image_border_radius":{"unit":"px","top":"","right":"","bottom":"","left":"","isLinked":true},"image_border_radius_tablet":{"unit":"px","top":"","right":"","bottom":"","left":"","isLinked":true},"image_border_radius_mobile":{"unit":"px","top":"","right":"","bottom":"","left":"","isLinked":true},"image_box_shadow_box_shadow_type":"","image_box_shadow_box_shadow":{"horizontal":0,"vertical":0,"blur":10,"spread":0,"color":"rgba(0,0,0,0.5)"},"caption_align":"","caption_align_tablet":"","caption_align_mobile":"","text_color":"","caption_background_color":"","caption_typography_typography":"","caption_typography_font_family":"","caption_typography_font_size":{"unit":"px","size":"","sizes":[]},"caption_typography_font_size_tablet":{"unit":"px","size":"","sizes":[]},"caption_typography_font_size_mobile":{"unit":"px","size":"","sizes":[]},"caption_typography_font_weight":"","caption_typography_text_transform":"","caption_typography_font_style":"","caption_typography_text_decoration":"","caption_typography_line_height":{"unit":"px","size":"","sizes":[]},"caption_typography_line_height_tablet":{"unit":"em","size":"","sizes":[]},"caption_typography_line_height_mobile":{"unit":"em","size":"","sizes":[]},"caption_typography_letter_spacing":{"unit":"px","size":"","sizes":[]},"caption_typography_letter_spacing_tablet":{"unit":"px","size":"","sizes":[]},"caption_typography_letter_spacing_mobile":{"unit":"px","size":"","sizes":[]},"caption_typography_word_spacing":{"unit":"px","size":"","sizes":[]},"caption_typography_word_spacing_tablet":{"unit":"em","size":"","sizes":[]},"caption_typography_word_spacing_mobile":{"unit":"em","size":"","sizes":[]},"caption_text_shadow_text_shadow_type":"","caption_text_shadow_text_shadow":{"horizontal":0,"vertical":0,"blur":10,"color":"rgba(0,0,0,0.3)"},"caption_space":{"unit":"px","size":"","sizes":[]},"caption_space_tablet":{"unit":"px","size":"","sizes":[]},"caption_space_mobile":{"unit":"px","size":"","sizes":[]},"_title":"","_margin":{"unit":"px","top":"","right":"","bottom":"","left":"","isLinked":true},"_margin_tablet":{"unit":"px","top":"","right":"","bottom":"","left":"","isLinked":true},"_margin_mobile":{"unit":"px","top":"","right":"","bottom":"","left":"","isLinked":true},"_padding":{"unit":"px","top":"","right":"","bottom":"","left":"","isLinked":true},"_padding_tablet":{"unit":"px","top":"","right":"","bottom":"","left":"","isLinked":true},"_padding_mobile":{"unit":"px","top":"","right":"","bottom":"","left":"","isLinked":true},"_element_width":"","_element_width_tablet":"","_element_width_mobile":"","_element_custom_width":{"unit":"%","size":"","sizes":[]},"_element_custom_width_tablet":{"unit":"px","size":"","sizes":[]},"_element_custom_width_mobile":{"unit":"px","size":"","sizes":[]},"_element_vertical_align":"","_element_vertical_align_tablet":"","_element_vertical_align_mobile":"","_position":"","_offset_orientation_h":"start","_offset_x":{"unit":"px","size":"0","sizes":[]},"_offset_x_tablet":{"unit":"px","size":"","sizes":[]},"_offset_x_mobile":{"unit":"px","size":"","sizes":[]},"_offset_x_end":{"unit":"px","size":"0","sizes":[]},"_offset_x_end_tablet":{"unit":"px","size":"","sizes":[]},"_offset_x_end_mobile":{"unit":"px","size":"","sizes":[]},"_offset_orientation_v":"start","_offset_y":{"unit":"px","size":"0","sizes":[]},"_offset_y_tablet":{"unit":"px","size":"","sizes":[]},"_offset_y_mobile":{"unit":"px","size":"","sizes":[]},"_offset_y_end":{"unit":"px","size":"0","sizes":[]},"_offset_y_end_tablet":{"unit":"px","size":"","sizes":[]},"_offset_y_end_mobile":{"unit":"px","size":"","sizes":[]},"_z_index":"","_z_index_tablet":"","_z_index_mobile":"","_element_id":"","_css_classes":"","element_parallax":"","scroll_x":0,"scroll_y":-80,"scroll_z":0,"scroll_smoothness":"30","wd_animation":"","wd_animation_duration":"normal","wd_animation_delay":100,"_animation":"","_animation_tablet":"","_animation_mobile":"","animation_duration":"","_animation_delay":"","_transform_rotate_popover":"","_transform_rotateZ_effect":{"unit":"px","size":"","sizes":[]},"_transform_rotateZ_effect_tablet":{"unit":"deg","size":"","sizes":[]},"_transform_rotateZ_effect_mobile":{"unit":"deg","size":"","sizes":[]},"_transform_rotate_3d":"","_transform_rotateX_effect":{"unit":"px","size":"","sizes":[]},"_transform_rotateX_effect_tablet":{"unit":"deg","size":"","sizes":[]},"_transform_rotateX_effect_mobile":{"unit":"deg","size":"","sizes":[]},"_transform_rotateY_effect":{"unit":"px","size":"","sizes":[]},"_transform_rotateY_effect_tablet":{"unit":"deg","size":"","sizes":[]},"_transform_rotateY_effect_mobile":{"unit":"deg","size":"","sizes":[]},"_transform_perspective_effect":{"unit":"px","size":"","sizes":[]},"_transform_perspective_effect_tablet":{"unit":"px","size":"","sizes":[]},"_transform_perspective_effect_mobile":{"unit":"px","size":"","sizes":[]},"_transform_translate_popover":"","_transform_translateX_effect":{"unit":"px","size":"","sizes":[]},"_transform_translateX_effect_tablet":{"unit":"px","size":"","sizes":[]},"_transform_translateX_effect_mobile":{"unit":"px","size":"","sizes":[]},"_transform_translateY_effect":{"unit":"px","size":"","sizes":[]},"_transform_translateY_effect_tablet":{"unit":"px","size":"","sizes":[]},"_transform_translateY_effect_mobile":{"unit":"px","size":"","sizes":[]},"_transform_scale_popover":"","_transform_keep_proportions":"yes","_transform_scale_effect":{"unit":"px","size":"","sizes":[]},"_transform_scale_effect_tablet":{"unit":"px","size":"","sizes":[]},"_transform_scale_effect_mobile":{"unit":"px","size":"","sizes":[]},"_transform_scaleX_effect":{"unit":"px","size":"","sizes":[]},"_transform_scaleX_effect_tablet":{"unit":"px","size":"","sizes":[]},"_transform_scaleX_effect_mobile":{"unit":"px","size":"","sizes":[]},"_transform_scaleY_effect":{"unit":"px","size":"","sizes":[]},"_transform_scaleY_effect_tablet":{"unit":"px","size":"","sizes":[]},"_transform_scaleY_effect_mobile":{"unit":"px","size":"","sizes":[]},"_transform_skew_popover":"","_transform_skewX_effect":{"unit":"px","size":"","sizes":[]},"_transform_skewX_effect_tablet":{"unit":"deg","size":"","sizes":[]},"_transform_skewX_effect_mobile":{"unit":"deg","size":"","sizes":[]},"_transform_skewY_effect":{"unit":"px","size":"","sizes":[]},"_transform_skewY_effect_tablet":{"unit":"deg","size":"","sizes":[]},"_transform_skewY_effect_mobile":{"unit":"deg","size":"","sizes":[]},"_transform_flipX_effect":"","_transform_flipY_effect":"","_transform_rotate_popover_hover":"","_transform_rotateZ_effect_hover":{"unit":"px","size":"","sizes":[]},"_transform_rotateZ_effect_hover_tablet":{"unit":"deg","size":"","sizes":[]},"_transform_rotateZ_effect_hover_mobile":{"unit":"deg","size":"","sizes":[]},"_transform_rotate_3d_hover":"","_transform_rotateX_effect_hover":{"unit":"px","size":"","sizes":[]},"_transform_rotateX_effect_hover_tablet":{"unit":"deg","size":"","sizes":[]},"_transform_rotateX_effect_hover_mobile":{"unit":"deg","size":"","sizes":[]},"_transform_rotateY_effect_hover":{"unit":"px","size":"","sizes":[]},"_transform_rotateY_effect_hover_tablet":{"unit":"deg","size":"","sizes":[]},"_transform_rotateY_effect_hover_mobile":{"unit":"deg","size":"","sizes":[]},"_transform_perspective_effect_hover":{"unit":"px","size":"","sizes":[]},"_transform_perspective_effect_hover_tablet":{"unit":"px","size":"","sizes":[]},"_transform_perspective_effect_hover_mobile":{"unit":"px","size":"","sizes":[]},"_transform_translate_popover_hover":"","_transform_translateX_effect_hover":{"unit":"px","size":"","sizes":[]},"_transform_translateX_effect_hover_tablet":{"unit":"px","size":"","sizes":[]},"_transform_translateX_effect_hover_mobile":{"unit":"px","size":"","sizes":[]},"_transform_translateY_effect_hover":{"unit":"px","size":"","sizes":[]},"_transform_translateY_effect_hover_tablet":{"unit":"px","size":"","sizes":[]},"_transform_translateY_effect_hover_mobile":{"unit":"px","size":"","sizes":[]},"_transform_scale_popover_hover":"","_transform_keep_proportions_hover":"yes","_transform_scale_effect_hover":{"unit":"px","size":"","sizes":[]},"_transform_scale_effect_hover_tablet":{"unit":"px","size":"","sizes":[]},"_transform_scale_effect_hover_mobile":{"unit":"px","size":"","sizes":[]},"_transform_scaleX_effect_hover":{"unit":"px","size":"","sizes":[]},"_transform_scaleX_effect_hover_tablet":{"unit":"px","size":"","sizes":[]},"_transform_scaleX_effect_hover_mobile":{"unit":"px","size":"","sizes":[]},"_transform_scaleY_effect_hover":{"unit":"px","size":"","sizes":[]},"_transform_scaleY_effect_hover_tablet":{"unit":"px","size":"","sizes":[]},"_transform_scaleY_effect_hover_mobile":{"unit":"px","size":"","sizes":[]},"_transform_skew_popover_hover":"","_transform_skewX_effect_hover":{"unit":"px","size":"","sizes":[]},"_transform_skewX_effect_hover_tablet":{"unit":"deg","size":"","sizes":[]},"_transform_skewX_effect_hover_mobile":{"unit":"deg","size":"","sizes":[]},"_transform_skewY_effect_hover":{"unit":"px","size":"","sizes":[]},"_transform_skewY_effect_hover_tablet":{"unit":"deg","size":"","sizes":[]},"_transform_skewY_effect_hover_mobile":{"unit":"deg","size":"","sizes":[]},"_transform_flipX_effect_hover":"","_transform_flipY_effect_hover":"","_transform_transition_hover":{"unit":"px","size":"","sizes":[]},"motion_fx_transform_x_anchor_point":"","motion_fx_transform_x_anchor_point_tablet":"","motion_fx_transform_x_anchor_point_mobile":"","motion_fx_transform_y_anchor_point":"","motion_fx_transform_y_anchor_point_tablet":"","motion_fx_transform_y_anchor_point_mobile":"","_background_background":"","_background_color":"","_background_color_stop":{"unit":"%","size":0,"sizes":[]},"_background_color_b":"#f2295b","_background_color_b_stop":{"unit":"%","size":100,"sizes":[]},"_background_gradient_type":"linear","_background_gradient_angle":{"unit":"deg","size":180,"sizes":[]},"_background_gradient_position":"center center","_background_image":{"url":"","id":"","size":""},"_background_image_tablet":{"url":"","id":"","size":""},"_background_image_mobile":{"url":"","id":"","size":""},"_background_position":"","_background_position_tablet":"","_background_position_mobile":"","_background_xpos":{"unit":"px","size":0,"sizes":[]},"_background_xpos_tablet":{"unit":"px","size":0,"sizes":[]},"_background_xpos_mobile":{"unit":"px","size":0,"sizes":[]},"_background_ypos":{"unit":"px","size":0,"sizes":[]},"_background_ypos_tablet":{"unit":"px","size":0,"sizes":[]},"_background_ypos_mobile":{"unit":"px","size":0,"sizes":[]},"_background_attachment":"","_background_repeat":"","_background_repeat_tablet":"","_background_repeat_mobile":"","_background_size":"","_background_size_tablet":"","_background_size_mobile":"","_background_bg_width":{"unit":"%","size":100,"sizes":[]},"_background_bg_width_tablet":{"unit":"px","size":"","sizes":[]},"_background_bg_width_mobile":{"unit":"px","size":"","sizes":[]},"_background_video_link":"","_background_video_start":"","_background_video_end":"","_background_play_once":"","_background_play_on_mobile":"","_background_privacy_mode":"","_background_video_fallback":{"url":"","id":"","size":""},"_background_slideshow_gallery":[],"_background_slideshow_loop":"yes","_background_slideshow_slide_duration":5000,"_background_slideshow_slide_transition":"fade","_background_slideshow_transition_duration":500,"_background_slideshow_background_size":"","_background_slideshow_background_size_tablet":"","_background_slideshow_background_size_mobile":"","_background_slideshow_background_position":"","_background_slideshow_background_position_tablet":"","_background_slideshow_background_position_mobile":"","_background_slideshow_lazyload":"","_background_slideshow_ken_burns":"","_background_slideshow_ken_burns_zoom_direction":"in","_background_hover_background":"","_background_hover_color":"","_background_hover_color_stop":{"unit":"%","size":0,"sizes":[]},"_background_hover_color_b":"#f2295b","_background_hover_color_b_stop":{"unit":"%","size":100,"sizes":[]},"_background_hover_gradient_type":"linear","_background_hover_gradient_angle":{"unit":"deg","size":180,"sizes":[]},"_background_hover_gradient_position":"center center","_background_hover_image":{"url":"","id":"","size":""},"_background_hover_image_tablet":{"url":"","id":"","size":""},"_background_hover_image_mobile":{"url":"","id":"","size":""},"_background_hover_position":"","_background_hover_position_tablet":"","_background_hover_position_mobile":"","_background_hover_xpos":{"unit":"px","size":0,"sizes":[]},"_background_hover_xpos_tablet":{"unit":"px","size":0,"sizes":[]},"_background_hover_xpos_mobile":{"unit":"px","size":0,"sizes":[]},"_background_hover_ypos":{"unit":"px","size":0,"sizes":[]},"_background_hover_ypos_tablet":{"unit":"px","size":0,"sizes":[]},"_background_hover_ypos_mobile":{"unit":"px","size":0,"sizes":[]},"_background_hover_attachment":"","_background_hover_repeat":"","_background_hover_repeat_tablet":"","_background_hover_repeat_mobile":"","_background_hover_size":"","_background_hover_size_tablet":"","_background_hover_size_mobile":"","_background_hover_bg_width":{"unit":"%","size":100,"sizes":[]},"_background_hover_bg_width_tablet":{"unit":"px","size":"","sizes":[]},"_background_hover_bg_width_mobile":{"unit":"px","size":"","sizes":[]},"_background_hover_video_link":"","_background_hover_video_start":"","_background_hover_video_end":"","_background_hover_play_once":"","_background_hover_play_on_mobile":"","_background_hover_privacy_mode":"","_background_hover_video_fallback":{"url":"","id":"","size":""},"_background_hover_slideshow_gallery":[],"_background_hover_slideshow_loop":"yes","_background_hover_slideshow_slide_duration":5000,"_background_hover_slideshow_slide_transition":"fade","_background_hover_slideshow_transition_duration":500,"_background_hover_slideshow_background_size":"","_background_hover_slideshow_background_size_tablet":"","_background_hover_slideshow_background_size_mobile":"","_background_hover_slideshow_background_position":"","_background_hover_slideshow_background_position_tablet":"","_background_hover_slideshow_background_position_mobile":"","_background_hover_slideshow_lazyload":"","_background_hover_slideshow_ken_burns":"","_background_hover_slideshow_ken_burns_zoom_direction":"in","_background_hover_transition":{"unit":"px","size":"","sizes":[]},"_border_border":"","_border_width":{"unit":"px","top":"","right":"","bottom":"","left":"","isLinked":true},"_border_width_tablet":{"unit":"px","top":"","right":"","bottom":"","left":"","isLinked":true},"_border_width_mobile":{"unit":"px","top":"","right":"","bottom":"","left":"","isLinked":true},"_border_color":"","_border_radius":{"unit":"px","top":"","right":"","bottom":"","left":"","isLinked":true},"_border_radius_tablet":{"unit":"px","top":"","right":"","bottom":"","left":"","isLinked":true},"_border_radius_mobile":{"unit":"px","top":"","right":"","bottom":"","left":"","isLinked":true},"_box_shadow_box_shadow_type":"","_box_shadow_box_shadow":{"horizontal":0,"vertical":0,"blur":10,"spread":0,"color":"rgba(0,0,0,0.5)"},"_box_shadow_box_shadow_position":" ","_border_hover_border":"","_border_hover_width":{"unit":"px","top":"","right":"","bottom":"","left":"","isLinked":true},"_border_hover_width_tablet":{"unit":"px","top":"","right":"","bottom":"","left":"","isLinked":true},"_border_hover_width_mobile":{"unit":"px","top":"","right":"","bottom":"","left":"","isLinked":true},"_border_hover_color":"","_border_radius_hover":{"unit":"px","top":"","right":"","bottom":"","left":"","isLinked":true},"_border_radius_hover_tablet":{"unit":"px","top":"","right":"","bottom":"","left":"","isLinked":true},"_border_radius_hover_mobile":{"unit":"px","top":"","right":"","bottom":"","left":"","isLinked":true},"_box_shadow_hover_box_shadow_type":"","_box_shadow_hover_box_shadow":{"horizontal":0,"vertical":0,"blur":10,"spread":0,"color":"rgba(0,0,0,0.5)"},"_box_shadow_hover_box_shadow_position":" ","_border_hover_transition":{"unit":"px","size":"","sizes":[]},"_mask_switch":"","_mask_shape":"circle","_mask_image":{"url":"","id":"","size":""},"_mask_notice":"","_mask_size":"contain","_mask_size_tablet":"","_mask_size_mobile":"","_mask_size_scale":{"unit":"%","size":100,"sizes":[]},"_mask_size_scale_tablet":{"unit":"px","size":"","sizes":[]},"_mask_size_scale_mobile":{"unit":"px","size":"","sizes":[]},"_mask_position":"center center","_mask_position_tablet":"","_mask_position_mobile":"","_mask_position_x":{"unit":"%","size":0,"sizes":[]},"_mask_position_x_tablet":{"unit":"px","size":"","sizes":[]},"_mask_position_x_mobile":{"unit":"px","size":"","sizes":[]},"_mask_position_y":{"unit":"%","size":0,"sizes":[]},"_mask_position_y_tablet":{"unit":"px","size":"","sizes":[]},"_mask_position_y_mobile":{"unit":"px","size":"","sizes":[]},"_mask_repeat":"no-repeat","_mask_repeat_tablet":"","_mask_repeat_mobile":"","hide_desktop":"","hide_tablet":"","hide_mobile":""},"defaultEditSettings":{"defaultEditRoute":"content"},"elements":[],"widgetType":"image","editSettings":{"defaultEditRoute":"content","panel":{"activeTab":"content","activeSection":"section_image"}}}]}](https://chocolate-mosquito-657420.hostingersite.com/wp-content/uploads/2023/09/1693891159778.png)
![{"type":"elementor","siteurl":"https://chocolate-mosquito-657420.hostingersite.com/wp-json/","elements":[{"id":"4f6799f","elType":"widget","isInner":false,"isLocked":false,"settings":{"image":{"url":"https://chocolate-mosquito-657420.hostingersite.com/wp-content/uploads/2023/09/1693891286960.png","id":19115,"size":"","alt":"","source":"library"},"image_size":"large","image_custom_dimension":{"width":"","height":""},"align":"","align_tablet":"","align_mobile":"","caption_source":"none","caption":"","link_to":"none","link":{"url":"","is_external":"","nofollow":"","custom_attributes":""},"open_lightbox":"default","view":"traditional","width":{"unit":"%","size":"","sizes":[]},"width_tablet":{"unit":"%","size":"","sizes":[]},"width_mobile":{"unit":"%","size":"","sizes":[]},"space":{"unit":"%","size":"","sizes":[]},"space_tablet":{"unit":"%","size":"","sizes":[]},"space_mobile":{"unit":"%","size":"","sizes":[]},"height":{"unit":"px","size":"","sizes":[]},"height_tablet":{"unit":"px","size":"","sizes":[]},"height_mobile":{"unit":"px","size":"","sizes":[]},"object-fit":"","object-fit_tablet":"","object-fit_mobile":"","object-position":"center center","object-position_tablet":"","object-position_mobile":"","opacity":{"unit":"px","size":"","sizes":[]},"css_filters_css_filter":"","css_filters_blur":{"unit":"px","size":0,"sizes":[]},"css_filters_brightness":{"unit":"px","size":100,"sizes":[]},"css_filters_contrast":{"unit":"px","size":100,"sizes":[]},"css_filters_saturate":{"unit":"px","size":100,"sizes":[]},"css_filters_hue":{"unit":"px","size":0,"sizes":[]},"opacity_hover":{"unit":"px","size":"","sizes":[]},"css_filters_hover_css_filter":"","css_filters_hover_blur":{"unit":"px","size":0,"sizes":[]},"css_filters_hover_brightness":{"unit":"px","size":100,"sizes":[]},"css_filters_hover_contrast":{"unit":"px","size":100,"sizes":[]},"css_filters_hover_saturate":{"unit":"px","size":100,"sizes":[]},"css_filters_hover_hue":{"unit":"px","size":0,"sizes":[]},"background_hover_transition":{"unit":"px","size":"","sizes":[]},"hover_animation":"","image_border_border":"","image_border_width":{"unit":"px","top":"","right":"","bottom":"","left":"","isLinked":true},"image_border_width_tablet":{"unit":"px","top":"","right":"","bottom":"","left":"","isLinked":true},"image_border_width_mobile":{"unit":"px","top":"","right":"","bottom":"","left":"","isLinked":true},"image_border_color":"","image_border_radius":{"unit":"px","top":"","right":"","bottom":"","left":"","isLinked":true},"image_border_radius_tablet":{"unit":"px","top":"","right":"","bottom":"","left":"","isLinked":true},"image_border_radius_mobile":{"unit":"px","top":"","right":"","bottom":"","left":"","isLinked":true},"image_box_shadow_box_shadow_type":"","image_box_shadow_box_shadow":{"horizontal":0,"vertical":0,"blur":10,"spread":0,"color":"rgba(0,0,0,0.5)"},"caption_align":"","caption_align_tablet":"","caption_align_mobile":"","text_color":"","caption_background_color":"","caption_typography_typography":"","caption_typography_font_family":"","caption_typography_font_size":{"unit":"px","size":"","sizes":[]},"caption_typography_font_size_tablet":{"unit":"px","size":"","sizes":[]},"caption_typography_font_size_mobile":{"unit":"px","size":"","sizes":[]},"caption_typography_font_weight":"","caption_typography_text_transform":"","caption_typography_font_style":"","caption_typography_text_decoration":"","caption_typography_line_height":{"unit":"px","size":"","sizes":[]},"caption_typography_line_height_tablet":{"unit":"em","size":"","sizes":[]},"caption_typography_line_height_mobile":{"unit":"em","size":"","sizes":[]},"caption_typography_letter_spacing":{"unit":"px","size":"","sizes":[]},"caption_typography_letter_spacing_tablet":{"unit":"px","size":"","sizes":[]},"caption_typography_letter_spacing_mobile":{"unit":"px","size":"","sizes":[]},"caption_typography_word_spacing":{"unit":"px","size":"","sizes":[]},"caption_typography_word_spacing_tablet":{"unit":"em","size":"","sizes":[]},"caption_typography_word_spacing_mobile":{"unit":"em","size":"","sizes":[]},"caption_text_shadow_text_shadow_type":"","caption_text_shadow_text_shadow":{"horizontal":0,"vertical":0,"blur":10,"color":"rgba(0,0,0,0.3)"},"caption_space":{"unit":"px","size":"","sizes":[]},"caption_space_tablet":{"unit":"px","size":"","sizes":[]},"caption_space_mobile":{"unit":"px","size":"","sizes":[]},"_title":"","_margin":{"unit":"px","top":"","right":"","bottom":"","left":"","isLinked":true},"_margin_tablet":{"unit":"px","top":"","right":"","bottom":"","left":"","isLinked":true},"_margin_mobile":{"unit":"px","top":"","right":"","bottom":"","left":"","isLinked":true},"_padding":{"unit":"px","top":"","right":"","bottom":"","left":"","isLinked":true},"_padding_tablet":{"unit":"px","top":"","right":"","bottom":"","left":"","isLinked":true},"_padding_mobile":{"unit":"px","top":"","right":"","bottom":"","left":"","isLinked":true},"_element_width":"","_element_width_tablet":"","_element_width_mobile":"","_element_custom_width":{"unit":"%","size":"","sizes":[]},"_element_custom_width_tablet":{"unit":"px","size":"","sizes":[]},"_element_custom_width_mobile":{"unit":"px","size":"","sizes":[]},"_element_vertical_align":"","_element_vertical_align_tablet":"","_element_vertical_align_mobile":"","_position":"","_offset_orientation_h":"start","_offset_x":{"unit":"px","size":"0","sizes":[]},"_offset_x_tablet":{"unit":"px","size":"","sizes":[]},"_offset_x_mobile":{"unit":"px","size":"","sizes":[]},"_offset_x_end":{"unit":"px","size":"0","sizes":[]},"_offset_x_end_tablet":{"unit":"px","size":"","sizes":[]},"_offset_x_end_mobile":{"unit":"px","size":"","sizes":[]},"_offset_orientation_v":"start","_offset_y":{"unit":"px","size":"0","sizes":[]},"_offset_y_tablet":{"unit":"px","size":"","sizes":[]},"_offset_y_mobile":{"unit":"px","size":"","sizes":[]},"_offset_y_end":{"unit":"px","size":"0","sizes":[]},"_offset_y_end_tablet":{"unit":"px","size":"","sizes":[]},"_offset_y_end_mobile":{"unit":"px","size":"","sizes":[]},"_z_index":"","_z_index_tablet":"","_z_index_mobile":"","_element_id":"","_css_classes":"","element_parallax":"","scroll_x":0,"scroll_y":-80,"scroll_z":0,"scroll_smoothness":"30","wd_animation":"","wd_animation_duration":"normal","wd_animation_delay":100,"_animation":"","_animation_tablet":"","_animation_mobile":"","animation_duration":"","_animation_delay":"","_transform_rotate_popover":"","_transform_rotateZ_effect":{"unit":"px","size":"","sizes":[]},"_transform_rotateZ_effect_tablet":{"unit":"deg","size":"","sizes":[]},"_transform_rotateZ_effect_mobile":{"unit":"deg","size":"","sizes":[]},"_transform_rotate_3d":"","_transform_rotateX_effect":{"unit":"px","size":"","sizes":[]},"_transform_rotateX_effect_tablet":{"unit":"deg","size":"","sizes":[]},"_transform_rotateX_effect_mobile":{"unit":"deg","size":"","sizes":[]},"_transform_rotateY_effect":{"unit":"px","size":"","sizes":[]},"_transform_rotateY_effect_tablet":{"unit":"deg","size":"","sizes":[]},"_transform_rotateY_effect_mobile":{"unit":"deg","size":"","sizes":[]},"_transform_perspective_effect":{"unit":"px","size":"","sizes":[]},"_transform_perspective_effect_tablet":{"unit":"px","size":"","sizes":[]},"_transform_perspective_effect_mobile":{"unit":"px","size":"","sizes":[]},"_transform_translate_popover":"","_transform_translateX_effect":{"unit":"px","size":"","sizes":[]},"_transform_translateX_effect_tablet":{"unit":"px","size":"","sizes":[]},"_transform_translateX_effect_mobile":{"unit":"px","size":"","sizes":[]},"_transform_translateY_effect":{"unit":"px","size":"","sizes":[]},"_transform_translateY_effect_tablet":{"unit":"px","size":"","sizes":[]},"_transform_translateY_effect_mobile":{"unit":"px","size":"","sizes":[]},"_transform_scale_popover":"","_transform_keep_proportions":"yes","_transform_scale_effect":{"unit":"px","size":"","sizes":[]},"_transform_scale_effect_tablet":{"unit":"px","size":"","sizes":[]},"_transform_scale_effect_mobile":{"unit":"px","size":"","sizes":[]},"_transform_scaleX_effect":{"unit":"px","size":"","sizes":[]},"_transform_scaleX_effect_tablet":{"unit":"px","size":"","sizes":[]},"_transform_scaleX_effect_mobile":{"unit":"px","size":"","sizes":[]},"_transform_scaleY_effect":{"unit":"px","size":"","sizes":[]},"_transform_scaleY_effect_tablet":{"unit":"px","size":"","sizes":[]},"_transform_scaleY_effect_mobile":{"unit":"px","size":"","sizes":[]},"_transform_skew_popover":"","_transform_skewX_effect":{"unit":"px","size":"","sizes":[]},"_transform_skewX_effect_tablet":{"unit":"deg","size":"","sizes":[]},"_transform_skewX_effect_mobile":{"unit":"deg","size":"","sizes":[]},"_transform_skewY_effect":{"unit":"px","size":"","sizes":[]},"_transform_skewY_effect_tablet":{"unit":"deg","size":"","sizes":[]},"_transform_skewY_effect_mobile":{"unit":"deg","size":"","sizes":[]},"_transform_flipX_effect":"","_transform_flipY_effect":"","_transform_rotate_popover_hover":"","_transform_rotateZ_effect_hover":{"unit":"px","size":"","sizes":[]},"_transform_rotateZ_effect_hover_tablet":{"unit":"deg","size":"","sizes":[]},"_transform_rotateZ_effect_hover_mobile":{"unit":"deg","size":"","sizes":[]},"_transform_rotate_3d_hover":"","_transform_rotateX_effect_hover":{"unit":"px","size":"","sizes":[]},"_transform_rotateX_effect_hover_tablet":{"unit":"deg","size":"","sizes":[]},"_transform_rotateX_effect_hover_mobile":{"unit":"deg","size":"","sizes":[]},"_transform_rotateY_effect_hover":{"unit":"px","size":"","sizes":[]},"_transform_rotateY_effect_hover_tablet":{"unit":"deg","size":"","sizes":[]},"_transform_rotateY_effect_hover_mobile":{"unit":"deg","size":"","sizes":[]},"_transform_perspective_effect_hover":{"unit":"px","size":"","sizes":[]},"_transform_perspective_effect_hover_tablet":{"unit":"px","size":"","sizes":[]},"_transform_perspective_effect_hover_mobile":{"unit":"px","size":"","sizes":[]},"_transform_translate_popover_hover":"","_transform_translateX_effect_hover":{"unit":"px","size":"","sizes":[]},"_transform_translateX_effect_hover_tablet":{"unit":"px","size":"","sizes":[]},"_transform_translateX_effect_hover_mobile":{"unit":"px","size":"","sizes":[]},"_transform_translateY_effect_hover":{"unit":"px","size":"","sizes":[]},"_transform_translateY_effect_hover_tablet":{"unit":"px","size":"","sizes":[]},"_transform_translateY_effect_hover_mobile":{"unit":"px","size":"","sizes":[]},"_transform_scale_popover_hover":"","_transform_keep_proportions_hover":"yes","_transform_scale_effect_hover":{"unit":"px","size":"","sizes":[]},"_transform_scale_effect_hover_tablet":{"unit":"px","size":"","sizes":[]},"_transform_scale_effect_hover_mobile":{"unit":"px","size":"","sizes":[]},"_transform_scaleX_effect_hover":{"unit":"px","size":"","sizes":[]},"_transform_scaleX_effect_hover_tablet":{"unit":"px","size":"","sizes":[]},"_transform_scaleX_effect_hover_mobile":{"unit":"px","size":"","sizes":[]},"_transform_scaleY_effect_hover":{"unit":"px","size":"","sizes":[]},"_transform_scaleY_effect_hover_tablet":{"unit":"px","size":"","sizes":[]},"_transform_scaleY_effect_hover_mobile":{"unit":"px","size":"","sizes":[]},"_transform_skew_popover_hover":"","_transform_skewX_effect_hover":{"unit":"px","size":"","sizes":[]},"_transform_skewX_effect_hover_tablet":{"unit":"deg","size":"","sizes":[]},"_transform_skewX_effect_hover_mobile":{"unit":"deg","size":"","sizes":[]},"_transform_skewY_effect_hover":{"unit":"px","size":"","sizes":[]},"_transform_skewY_effect_hover_tablet":{"unit":"deg","size":"","sizes":[]},"_transform_skewY_effect_hover_mobile":{"unit":"deg","size":"","sizes":[]},"_transform_flipX_effect_hover":"","_transform_flipY_effect_hover":"","_transform_transition_hover":{"unit":"px","size":"","sizes":[]},"motion_fx_transform_x_anchor_point":"","motion_fx_transform_x_anchor_point_tablet":"","motion_fx_transform_x_anchor_point_mobile":"","motion_fx_transform_y_anchor_point":"","motion_fx_transform_y_anchor_point_tablet":"","motion_fx_transform_y_anchor_point_mobile":"","_background_background":"","_background_color":"","_background_color_stop":{"unit":"%","size":0,"sizes":[]},"_background_color_b":"#f2295b","_background_color_b_stop":{"unit":"%","size":100,"sizes":[]},"_background_gradient_type":"linear","_background_gradient_angle":{"unit":"deg","size":180,"sizes":[]},"_background_gradient_position":"center center","_background_image":{"url":"","id":"","size":""},"_background_image_tablet":{"url":"","id":"","size":""},"_background_image_mobile":{"url":"","id":"","size":""},"_background_position":"","_background_position_tablet":"","_background_position_mobile":"","_background_xpos":{"unit":"px","size":0,"sizes":[]},"_background_xpos_tablet":{"unit":"px","size":0,"sizes":[]},"_background_xpos_mobile":{"unit":"px","size":0,"sizes":[]},"_background_ypos":{"unit":"px","size":0,"sizes":[]},"_background_ypos_tablet":{"unit":"px","size":0,"sizes":[]},"_background_ypos_mobile":{"unit":"px","size":0,"sizes":[]},"_background_attachment":"","_background_repeat":"","_background_repeat_tablet":"","_background_repeat_mobile":"","_background_size":"","_background_size_tablet":"","_background_size_mobile":"","_background_bg_width":{"unit":"%","size":100,"sizes":[]},"_background_bg_width_tablet":{"unit":"px","size":"","sizes":[]},"_background_bg_width_mobile":{"unit":"px","size":"","sizes":[]},"_background_video_link":"","_background_video_start":"","_background_video_end":"","_background_play_once":"","_background_play_on_mobile":"","_background_privacy_mode":"","_background_video_fallback":{"url":"","id":"","size":""},"_background_slideshow_gallery":[],"_background_slideshow_loop":"yes","_background_slideshow_slide_duration":5000,"_background_slideshow_slide_transition":"fade","_background_slideshow_transition_duration":500,"_background_slideshow_background_size":"","_background_slideshow_background_size_tablet":"","_background_slideshow_background_size_mobile":"","_background_slideshow_background_position":"","_background_slideshow_background_position_tablet":"","_background_slideshow_background_position_mobile":"","_background_slideshow_lazyload":"","_background_slideshow_ken_burns":"","_background_slideshow_ken_burns_zoom_direction":"in","_background_hover_background":"","_background_hover_color":"","_background_hover_color_stop":{"unit":"%","size":0,"sizes":[]},"_background_hover_color_b":"#f2295b","_background_hover_color_b_stop":{"unit":"%","size":100,"sizes":[]},"_background_hover_gradient_type":"linear","_background_hover_gradient_angle":{"unit":"deg","size":180,"sizes":[]},"_background_hover_gradient_position":"center center","_background_hover_image":{"url":"","id":"","size":""},"_background_hover_image_tablet":{"url":"","id":"","size":""},"_background_hover_image_mobile":{"url":"","id":"","size":""},"_background_hover_position":"","_background_hover_position_tablet":"","_background_hover_position_mobile":"","_background_hover_xpos":{"unit":"px","size":0,"sizes":[]},"_background_hover_xpos_tablet":{"unit":"px","size":0,"sizes":[]},"_background_hover_xpos_mobile":{"unit":"px","size":0,"sizes":[]},"_background_hover_ypos":{"unit":"px","size":0,"sizes":[]},"_background_hover_ypos_tablet":{"unit":"px","size":0,"sizes":[]},"_background_hover_ypos_mobile":{"unit":"px","size":0,"sizes":[]},"_background_hover_attachment":"","_background_hover_repeat":"","_background_hover_repeat_tablet":"","_background_hover_repeat_mobile":"","_background_hover_size":"","_background_hover_size_tablet":"","_background_hover_size_mobile":"","_background_hover_bg_width":{"unit":"%","size":100,"sizes":[]},"_background_hover_bg_width_tablet":{"unit":"px","size":"","sizes":[]},"_background_hover_bg_width_mobile":{"unit":"px","size":"","sizes":[]},"_background_hover_video_link":"","_background_hover_video_start":"","_background_hover_video_end":"","_background_hover_play_once":"","_background_hover_play_on_mobile":"","_background_hover_privacy_mode":"","_background_hover_video_fallback":{"url":"","id":"","size":""},"_background_hover_slideshow_gallery":[],"_background_hover_slideshow_loop":"yes","_background_hover_slideshow_slide_duration":5000,"_background_hover_slideshow_slide_transition":"fade","_background_hover_slideshow_transition_duration":500,"_background_hover_slideshow_background_size":"","_background_hover_slideshow_background_size_tablet":"","_background_hover_slideshow_background_size_mobile":"","_background_hover_slideshow_background_position":"","_background_hover_slideshow_background_position_tablet":"","_background_hover_slideshow_background_position_mobile":"","_background_hover_slideshow_lazyload":"","_background_hover_slideshow_ken_burns":"","_background_hover_slideshow_ken_burns_zoom_direction":"in","_background_hover_transition":{"unit":"px","size":"","sizes":[]},"_border_border":"","_border_width":{"unit":"px","top":"","right":"","bottom":"","left":"","isLinked":true},"_border_width_tablet":{"unit":"px","top":"","right":"","bottom":"","left":"","isLinked":true},"_border_width_mobile":{"unit":"px","top":"","right":"","bottom":"","left":"","isLinked":true},"_border_color":"","_border_radius":{"unit":"px","top":"","right":"","bottom":"","left":"","isLinked":true},"_border_radius_tablet":{"unit":"px","top":"","right":"","bottom":"","left":"","isLinked":true},"_border_radius_mobile":{"unit":"px","top":"","right":"","bottom":"","left":"","isLinked":true},"_box_shadow_box_shadow_type":"","_box_shadow_box_shadow":{"horizontal":0,"vertical":0,"blur":10,"spread":0,"color":"rgba(0,0,0,0.5)"},"_box_shadow_box_shadow_position":" ","_border_hover_border":"","_border_hover_width":{"unit":"px","top":"","right":"","bottom":"","left":"","isLinked":true},"_border_hover_width_tablet":{"unit":"px","top":"","right":"","bottom":"","left":"","isLinked":true},"_border_hover_width_mobile":{"unit":"px","top":"","right":"","bottom":"","left":"","isLinked":true},"_border_hover_color":"","_border_radius_hover":{"unit":"px","top":"","right":"","bottom":"","left":"","isLinked":true},"_border_radius_hover_tablet":{"unit":"px","top":"","right":"","bottom":"","left":"","isLinked":true},"_border_radius_hover_mobile":{"unit":"px","top":"","right":"","bottom":"","left":"","isLinked":true},"_box_shadow_hover_box_shadow_type":"","_box_shadow_hover_box_shadow":{"horizontal":0,"vertical":0,"blur":10,"spread":0,"color":"rgba(0,0,0,0.5)"},"_box_shadow_hover_box_shadow_position":" ","_border_hover_transition":{"unit":"px","size":"","sizes":[]},"_mask_switch":"","_mask_shape":"circle","_mask_image":{"url":"","id":"","size":""},"_mask_notice":"","_mask_size":"contain","_mask_size_tablet":"","_mask_size_mobile":"","_mask_size_scale":{"unit":"%","size":100,"sizes":[]},"_mask_size_scale_tablet":{"unit":"px","size":"","sizes":[]},"_mask_size_scale_mobile":{"unit":"px","size":"","sizes":[]},"_mask_position":"center center","_mask_position_tablet":"","_mask_position_mobile":"","_mask_position_x":{"unit":"%","size":0,"sizes":[]},"_mask_position_x_tablet":{"unit":"px","size":"","sizes":[]},"_mask_position_x_mobile":{"unit":"px","size":"","sizes":[]},"_mask_position_y":{"unit":"%","size":0,"sizes":[]},"_mask_position_y_tablet":{"unit":"px","size":"","sizes":[]},"_mask_position_y_mobile":{"unit":"px","size":"","sizes":[]},"_mask_repeat":"no-repeat","_mask_repeat_tablet":"","_mask_repeat_mobile":"","hide_desktop":"","hide_tablet":"","hide_mobile":""},"defaultEditSettings":{"defaultEditRoute":"content"},"elements":[],"widgetType":"image","editSettings":{"defaultEditRoute":"content","panel":{"activeTab":"content","activeSection":"section_image"}}}]}](https://chocolate-mosquito-657420.hostingersite.com/wp-content/uploads/2023/09/1693891272716.png)
![{"type":"elementor","siteurl":"https://chocolate-mosquito-657420.hostingersite.com/wp-json/","elements":[{"id":"4f6799f","elType":"widget","isInner":false,"isLocked":false,"settings":{"image":{"url":"https://chocolate-mosquito-657420.hostingersite.com/wp-content/uploads/2023/09/1693891286960.png","id":19115,"size":"","alt":"","source":"library"},"image_size":"large","image_custom_dimension":{"width":"","height":""},"align":"","align_tablet":"","align_mobile":"","caption_source":"none","caption":"","link_to":"none","link":{"url":"","is_external":"","nofollow":"","custom_attributes":""},"open_lightbox":"default","view":"traditional","width":{"unit":"%","size":"","sizes":[]},"width_tablet":{"unit":"%","size":"","sizes":[]},"width_mobile":{"unit":"%","size":"","sizes":[]},"space":{"unit":"%","size":"","sizes":[]},"space_tablet":{"unit":"%","size":"","sizes":[]},"space_mobile":{"unit":"%","size":"","sizes":[]},"height":{"unit":"px","size":"","sizes":[]},"height_tablet":{"unit":"px","size":"","sizes":[]},"height_mobile":{"unit":"px","size":"","sizes":[]},"object-fit":"","object-fit_tablet":"","object-fit_mobile":"","object-position":"center center","object-position_tablet":"","object-position_mobile":"","opacity":{"unit":"px","size":"","sizes":[]},"css_filters_css_filter":"","css_filters_blur":{"unit":"px","size":0,"sizes":[]},"css_filters_brightness":{"unit":"px","size":100,"sizes":[]},"css_filters_contrast":{"unit":"px","size":100,"sizes":[]},"css_filters_saturate":{"unit":"px","size":100,"sizes":[]},"css_filters_hue":{"unit":"px","size":0,"sizes":[]},"opacity_hover":{"unit":"px","size":"","sizes":[]},"css_filters_hover_css_filter":"","css_filters_hover_blur":{"unit":"px","size":0,"sizes":[]},"css_filters_hover_brightness":{"unit":"px","size":100,"sizes":[]},"css_filters_hover_contrast":{"unit":"px","size":100,"sizes":[]},"css_filters_hover_saturate":{"unit":"px","size":100,"sizes":[]},"css_filters_hover_hue":{"unit":"px","size":0,"sizes":[]},"background_hover_transition":{"unit":"px","size":"","sizes":[]},"hover_animation":"","image_border_border":"","image_border_width":{"unit":"px","top":"","right":"","bottom":"","left":"","isLinked":true},"image_border_width_tablet":{"unit":"px","top":"","right":"","bottom":"","left":"","isLinked":true},"image_border_width_mobile":{"unit":"px","top":"","right":"","bottom":"","left":"","isLinked":true},"image_border_color":"","image_border_radius":{"unit":"px","top":"","right":"","bottom":"","left":"","isLinked":true},"image_border_radius_tablet":{"unit":"px","top":"","right":"","bottom":"","left":"","isLinked":true},"image_border_radius_mobile":{"unit":"px","top":"","right":"","bottom":"","left":"","isLinked":true},"image_box_shadow_box_shadow_type":"","image_box_shadow_box_shadow":{"horizontal":0,"vertical":0,"blur":10,"spread":0,"color":"rgba(0,0,0,0.5)"},"caption_align":"","caption_align_tablet":"","caption_align_mobile":"","text_color":"","caption_background_color":"","caption_typography_typography":"","caption_typography_font_family":"","caption_typography_font_size":{"unit":"px","size":"","sizes":[]},"caption_typography_font_size_tablet":{"unit":"px","size":"","sizes":[]},"caption_typography_font_size_mobile":{"unit":"px","size":"","sizes":[]},"caption_typography_font_weight":"","caption_typography_text_transform":"","caption_typography_font_style":"","caption_typography_text_decoration":"","caption_typography_line_height":{"unit":"px","size":"","sizes":[]},"caption_typography_line_height_tablet":{"unit":"em","size":"","sizes":[]},"caption_typography_line_height_mobile":{"unit":"em","size":"","sizes":[]},"caption_typography_letter_spacing":{"unit":"px","size":"","sizes":[]},"caption_typography_letter_spacing_tablet":{"unit":"px","size":"","sizes":[]},"caption_typography_letter_spacing_mobile":{"unit":"px","size":"","sizes":[]},"caption_typography_word_spacing":{"unit":"px","size":"","sizes":[]},"caption_typography_word_spacing_tablet":{"unit":"em","size":"","sizes":[]},"caption_typography_word_spacing_mobile":{"unit":"em","size":"","sizes":[]},"caption_text_shadow_text_shadow_type":"","caption_text_shadow_text_shadow":{"horizontal":0,"vertical":0,"blur":10,"color":"rgba(0,0,0,0.3)"},"caption_space":{"unit":"px","size":"","sizes":[]},"caption_space_tablet":{"unit":"px","size":"","sizes":[]},"caption_space_mobile":{"unit":"px","size":"","sizes":[]},"_title":"","_margin":{"unit":"px","top":"","right":"","bottom":"","left":"","isLinked":true},"_margin_tablet":{"unit":"px","top":"","right":"","bottom":"","left":"","isLinked":true},"_margin_mobile":{"unit":"px","top":"","right":"","bottom":"","left":"","isLinked":true},"_padding":{"unit":"px","top":"","right":"","bottom":"","left":"","isLinked":true},"_padding_tablet":{"unit":"px","top":"","right":"","bottom":"","left":"","isLinked":true},"_padding_mobile":{"unit":"px","top":"","right":"","bottom":"","left":"","isLinked":true},"_element_width":"","_element_width_tablet":"","_element_width_mobile":"","_element_custom_width":{"unit":"%","size":"","sizes":[]},"_element_custom_width_tablet":{"unit":"px","size":"","sizes":[]},"_element_custom_width_mobile":{"unit":"px","size":"","sizes":[]},"_element_vertical_align":"","_element_vertical_align_tablet":"","_element_vertical_align_mobile":"","_position":"","_offset_orientation_h":"start","_offset_x":{"unit":"px","size":"0","sizes":[]},"_offset_x_tablet":{"unit":"px","size":"","sizes":[]},"_offset_x_mobile":{"unit":"px","size":"","sizes":[]},"_offset_x_end":{"unit":"px","size":"0","sizes":[]},"_offset_x_end_tablet":{"unit":"px","size":"","sizes":[]},"_offset_x_end_mobile":{"unit":"px","size":"","sizes":[]},"_offset_orientation_v":"start","_offset_y":{"unit":"px","size":"0","sizes":[]},"_offset_y_tablet":{"unit":"px","size":"","sizes":[]},"_offset_y_mobile":{"unit":"px","size":"","sizes":[]},"_offset_y_end":{"unit":"px","size":"0","sizes":[]},"_offset_y_end_tablet":{"unit":"px","size":"","sizes":[]},"_offset_y_end_mobile":{"unit":"px","size":"","sizes":[]},"_z_index":"","_z_index_tablet":"","_z_index_mobile":"","_element_id":"","_css_classes":"","element_parallax":"","scroll_x":0,"scroll_y":-80,"scroll_z":0,"scroll_smoothness":"30","wd_animation":"","wd_animation_duration":"normal","wd_animation_delay":100,"_animation":"","_animation_tablet":"","_animation_mobile":"","animation_duration":"","_animation_delay":"","_transform_rotate_popover":"","_transform_rotateZ_effect":{"unit":"px","size":"","sizes":[]},"_transform_rotateZ_effect_tablet":{"unit":"deg","size":"","sizes":[]},"_transform_rotateZ_effect_mobile":{"unit":"deg","size":"","sizes":[]},"_transform_rotate_3d":"","_transform_rotateX_effect":{"unit":"px","size":"","sizes":[]},"_transform_rotateX_effect_tablet":{"unit":"deg","size":"","sizes":[]},"_transform_rotateX_effect_mobile":{"unit":"deg","size":"","sizes":[]},"_transform_rotateY_effect":{"unit":"px","size":"","sizes":[]},"_transform_rotateY_effect_tablet":{"unit":"deg","size":"","sizes":[]},"_transform_rotateY_effect_mobile":{"unit":"deg","size":"","sizes":[]},"_transform_perspective_effect":{"unit":"px","size":"","sizes":[]},"_transform_perspective_effect_tablet":{"unit":"px","size":"","sizes":[]},"_transform_perspective_effect_mobile":{"unit":"px","size":"","sizes":[]},"_transform_translate_popover":"","_transform_translateX_effect":{"unit":"px","size":"","sizes":[]},"_transform_translateX_effect_tablet":{"unit":"px","size":"","sizes":[]},"_transform_translateX_effect_mobile":{"unit":"px","size":"","sizes":[]},"_transform_translateY_effect":{"unit":"px","size":"","sizes":[]},"_transform_translateY_effect_tablet":{"unit":"px","size":"","sizes":[]},"_transform_translateY_effect_mobile":{"unit":"px","size":"","sizes":[]},"_transform_scale_popover":"","_transform_keep_proportions":"yes","_transform_scale_effect":{"unit":"px","size":"","sizes":[]},"_transform_scale_effect_tablet":{"unit":"px","size":"","sizes":[]},"_transform_scale_effect_mobile":{"unit":"px","size":"","sizes":[]},"_transform_scaleX_effect":{"unit":"px","size":"","sizes":[]},"_transform_scaleX_effect_tablet":{"unit":"px","size":"","sizes":[]},"_transform_scaleX_effect_mobile":{"unit":"px","size":"","sizes":[]},"_transform_scaleY_effect":{"unit":"px","size":"","sizes":[]},"_transform_scaleY_effect_tablet":{"unit":"px","size":"","sizes":[]},"_transform_scaleY_effect_mobile":{"unit":"px","size":"","sizes":[]},"_transform_skew_popover":"","_transform_skewX_effect":{"unit":"px","size":"","sizes":[]},"_transform_skewX_effect_tablet":{"unit":"deg","size":"","sizes":[]},"_transform_skewX_effect_mobile":{"unit":"deg","size":"","sizes":[]},"_transform_skewY_effect":{"unit":"px","size":"","sizes":[]},"_transform_skewY_effect_tablet":{"unit":"deg","size":"","sizes":[]},"_transform_skewY_effect_mobile":{"unit":"deg","size":"","sizes":[]},"_transform_flipX_effect":"","_transform_flipY_effect":"","_transform_rotate_popover_hover":"","_transform_rotateZ_effect_hover":{"unit":"px","size":"","sizes":[]},"_transform_rotateZ_effect_hover_tablet":{"unit":"deg","size":"","sizes":[]},"_transform_rotateZ_effect_hover_mobile":{"unit":"deg","size":"","sizes":[]},"_transform_rotate_3d_hover":"","_transform_rotateX_effect_hover":{"unit":"px","size":"","sizes":[]},"_transform_rotateX_effect_hover_tablet":{"unit":"deg","size":"","sizes":[]},"_transform_rotateX_effect_hover_mobile":{"unit":"deg","size":"","sizes":[]},"_transform_rotateY_effect_hover":{"unit":"px","size":"","sizes":[]},"_transform_rotateY_effect_hover_tablet":{"unit":"deg","size":"","sizes":[]},"_transform_rotateY_effect_hover_mobile":{"unit":"deg","size":"","sizes":[]},"_transform_perspective_effect_hover":{"unit":"px","size":"","sizes":[]},"_transform_perspective_effect_hover_tablet":{"unit":"px","size":"","sizes":[]},"_transform_perspective_effect_hover_mobile":{"unit":"px","size":"","sizes":[]},"_transform_translate_popover_hover":"","_transform_translateX_effect_hover":{"unit":"px","size":"","sizes":[]},"_transform_translateX_effect_hover_tablet":{"unit":"px","size":"","sizes":[]},"_transform_translateX_effect_hover_mobile":{"unit":"px","size":"","sizes":[]},"_transform_translateY_effect_hover":{"unit":"px","size":"","sizes":[]},"_transform_translateY_effect_hover_tablet":{"unit":"px","size":"","sizes":[]},"_transform_translateY_effect_hover_mobile":{"unit":"px","size":"","sizes":[]},"_transform_scale_popover_hover":"","_transform_keep_proportions_hover":"yes","_transform_scale_effect_hover":{"unit":"px","size":"","sizes":[]},"_transform_scale_effect_hover_tablet":{"unit":"px","size":"","sizes":[]},"_transform_scale_effect_hover_mobile":{"unit":"px","size":"","sizes":[]},"_transform_scaleX_effect_hover":{"unit":"px","size":"","sizes":[]},"_transform_scaleX_effect_hover_tablet":{"unit":"px","size":"","sizes":[]},"_transform_scaleX_effect_hover_mobile":{"unit":"px","size":"","sizes":[]},"_transform_scaleY_effect_hover":{"unit":"px","size":"","sizes":[]},"_transform_scaleY_effect_hover_tablet":{"unit":"px","size":"","sizes":[]},"_transform_scaleY_effect_hover_mobile":{"unit":"px","size":"","sizes":[]},"_transform_skew_popover_hover":"","_transform_skewX_effect_hover":{"unit":"px","size":"","sizes":[]},"_transform_skewX_effect_hover_tablet":{"unit":"deg","size":"","sizes":[]},"_transform_skewX_effect_hover_mobile":{"unit":"deg","size":"","sizes":[]},"_transform_skewY_effect_hover":{"unit":"px","size":"","sizes":[]},"_transform_skewY_effect_hover_tablet":{"unit":"deg","size":"","sizes":[]},"_transform_skewY_effect_hover_mobile":{"unit":"deg","size":"","sizes":[]},"_transform_flipX_effect_hover":"","_transform_flipY_effect_hover":"","_transform_transition_hover":{"unit":"px","size":"","sizes":[]},"motion_fx_transform_x_anchor_point":"","motion_fx_transform_x_anchor_point_tablet":"","motion_fx_transform_x_anchor_point_mobile":"","motion_fx_transform_y_anchor_point":"","motion_fx_transform_y_anchor_point_tablet":"","motion_fx_transform_y_anchor_point_mobile":"","_background_background":"","_background_color":"","_background_color_stop":{"unit":"%","size":0,"sizes":[]},"_background_color_b":"#f2295b","_background_color_b_stop":{"unit":"%","size":100,"sizes":[]},"_background_gradient_type":"linear","_background_gradient_angle":{"unit":"deg","size":180,"sizes":[]},"_background_gradient_position":"center center","_background_image":{"url":"","id":"","size":""},"_background_image_tablet":{"url":"","id":"","size":""},"_background_image_mobile":{"url":"","id":"","size":""},"_background_position":"","_background_position_tablet":"","_background_position_mobile":"","_background_xpos":{"unit":"px","size":0,"sizes":[]},"_background_xpos_tablet":{"unit":"px","size":0,"sizes":[]},"_background_xpos_mobile":{"unit":"px","size":0,"sizes":[]},"_background_ypos":{"unit":"px","size":0,"sizes":[]},"_background_ypos_tablet":{"unit":"px","size":0,"sizes":[]},"_background_ypos_mobile":{"unit":"px","size":0,"sizes":[]},"_background_attachment":"","_background_repeat":"","_background_repeat_tablet":"","_background_repeat_mobile":"","_background_size":"","_background_size_tablet":"","_background_size_mobile":"","_background_bg_width":{"unit":"%","size":100,"sizes":[]},"_background_bg_width_tablet":{"unit":"px","size":"","sizes":[]},"_background_bg_width_mobile":{"unit":"px","size":"","sizes":[]},"_background_video_link":"","_background_video_start":"","_background_video_end":"","_background_play_once":"","_background_play_on_mobile":"","_background_privacy_mode":"","_background_video_fallback":{"url":"","id":"","size":""},"_background_slideshow_gallery":[],"_background_slideshow_loop":"yes","_background_slideshow_slide_duration":5000,"_background_slideshow_slide_transition":"fade","_background_slideshow_transition_duration":500,"_background_slideshow_background_size":"","_background_slideshow_background_size_tablet":"","_background_slideshow_background_size_mobile":"","_background_slideshow_background_position":"","_background_slideshow_background_position_tablet":"","_background_slideshow_background_position_mobile":"","_background_slideshow_lazyload":"","_background_slideshow_ken_burns":"","_background_slideshow_ken_burns_zoom_direction":"in","_background_hover_background":"","_background_hover_color":"","_background_hover_color_stop":{"unit":"%","size":0,"sizes":[]},"_background_hover_color_b":"#f2295b","_background_hover_color_b_stop":{"unit":"%","size":100,"sizes":[]},"_background_hover_gradient_type":"linear","_background_hover_gradient_angle":{"unit":"deg","size":180,"sizes":[]},"_background_hover_gradient_position":"center center","_background_hover_image":{"url":"","id":"","size":""},"_background_hover_image_tablet":{"url":"","id":"","size":""},"_background_hover_image_mobile":{"url":"","id":"","size":""},"_background_hover_position":"","_background_hover_position_tablet":"","_background_hover_position_mobile":"","_background_hover_xpos":{"unit":"px","size":0,"sizes":[]},"_background_hover_xpos_tablet":{"unit":"px","size":0,"sizes":[]},"_background_hover_xpos_mobile":{"unit":"px","size":0,"sizes":[]},"_background_hover_ypos":{"unit":"px","size":0,"sizes":[]},"_background_hover_ypos_tablet":{"unit":"px","size":0,"sizes":[]},"_background_hover_ypos_mobile":{"unit":"px","size":0,"sizes":[]},"_background_hover_attachment":"","_background_hover_repeat":"","_background_hover_repeat_tablet":"","_background_hover_repeat_mobile":"","_background_hover_size":"","_background_hover_size_tablet":"","_background_hover_size_mobile":"","_background_hover_bg_width":{"unit":"%","size":100,"sizes":[]},"_background_hover_bg_width_tablet":{"unit":"px","size":"","sizes":[]},"_background_hover_bg_width_mobile":{"unit":"px","size":"","sizes":[]},"_background_hover_video_link":"","_background_hover_video_start":"","_background_hover_video_end":"","_background_hover_play_once":"","_background_hover_play_on_mobile":"","_background_hover_privacy_mode":"","_background_hover_video_fallback":{"url":"","id":"","size":""},"_background_hover_slideshow_gallery":[],"_background_hover_slideshow_loop":"yes","_background_hover_slideshow_slide_duration":5000,"_background_hover_slideshow_slide_transition":"fade","_background_hover_slideshow_transition_duration":500,"_background_hover_slideshow_background_size":"","_background_hover_slideshow_background_size_tablet":"","_background_hover_slideshow_background_size_mobile":"","_background_hover_slideshow_background_position":"","_background_hover_slideshow_background_position_tablet":"","_background_hover_slideshow_background_position_mobile":"","_background_hover_slideshow_lazyload":"","_background_hover_slideshow_ken_burns":"","_background_hover_slideshow_ken_burns_zoom_direction":"in","_background_hover_transition":{"unit":"px","size":"","sizes":[]},"_border_border":"","_border_width":{"unit":"px","top":"","right":"","bottom":"","left":"","isLinked":true},"_border_width_tablet":{"unit":"px","top":"","right":"","bottom":"","left":"","isLinked":true},"_border_width_mobile":{"unit":"px","top":"","right":"","bottom":"","left":"","isLinked":true},"_border_color":"","_border_radius":{"unit":"px","top":"","right":"","bottom":"","left":"","isLinked":true},"_border_radius_tablet":{"unit":"px","top":"","right":"","bottom":"","left":"","isLinked":true},"_border_radius_mobile":{"unit":"px","top":"","right":"","bottom":"","left":"","isLinked":true},"_box_shadow_box_shadow_type":"","_box_shadow_box_shadow":{"horizontal":0,"vertical":0,"blur":10,"spread":0,"color":"rgba(0,0,0,0.5)"},"_box_shadow_box_shadow_position":" ","_border_hover_border":"","_border_hover_width":{"unit":"px","top":"","right":"","bottom":"","left":"","isLinked":true},"_border_hover_width_tablet":{"unit":"px","top":"","right":"","bottom":"","left":"","isLinked":true},"_border_hover_width_mobile":{"unit":"px","top":"","right":"","bottom":"","left":"","isLinked":true},"_border_hover_color":"","_border_radius_hover":{"unit":"px","top":"","right":"","bottom":"","left":"","isLinked":true},"_border_radius_hover_tablet":{"unit":"px","top":"","right":"","bottom":"","left":"","isLinked":true},"_border_radius_hover_mobile":{"unit":"px","top":"","right":"","bottom":"","left":"","isLinked":true},"_box_shadow_hover_box_shadow_type":"","_box_shadow_hover_box_shadow":{"horizontal":0,"vertical":0,"blur":10,"spread":0,"color":"rgba(0,0,0,0.5)"},"_box_shadow_hover_box_shadow_position":" ","_border_hover_transition":{"unit":"px","size":"","sizes":[]},"_mask_switch":"","_mask_shape":"circle","_mask_image":{"url":"","id":"","size":""},"_mask_notice":"","_mask_size":"contain","_mask_size_tablet":"","_mask_size_mobile":"","_mask_size_scale":{"unit":"%","size":100,"sizes":[]},"_mask_size_scale_tablet":{"unit":"px","size":"","sizes":[]},"_mask_size_scale_mobile":{"unit":"px","size":"","sizes":[]},"_mask_position":"center center","_mask_position_tablet":"","_mask_position_mobile":"","_mask_position_x":{"unit":"%","size":0,"sizes":[]},"_mask_position_x_tablet":{"unit":"px","size":"","sizes":[]},"_mask_position_x_mobile":{"unit":"px","size":"","sizes":[]},"_mask_position_y":{"unit":"%","size":0,"sizes":[]},"_mask_position_y_tablet":{"unit":"px","size":"","sizes":[]},"_mask_position_y_mobile":{"unit":"px","size":"","sizes":[]},"_mask_repeat":"no-repeat","_mask_repeat_tablet":"","_mask_repeat_mobile":"","hide_desktop":"","hide_tablet":"","hide_mobile":""},"defaultEditSettings":{"defaultEditRoute":"content"},"elements":[],"widgetType":"image","editSettings":{"defaultEditRoute":"content","panel":{"activeTab":"content","activeSection":"section_image"}}}]}](https://chocolate-mosquito-657420.hostingersite.com/wp-content/uploads/2023/09/1693891286960.png)
![{"type":"elementor","siteurl":"https://chocolate-mosquito-657420.hostingersite.com/wp-json/","elements":[{"id":"4f6799f","elType":"widget","isInner":false,"isLocked":false,"settings":{"image":{"url":"https://chocolate-mosquito-657420.hostingersite.com/wp-content/uploads/2023/09/1693891286960.png","id":19115,"size":"","alt":"","source":"library"},"image_size":"large","image_custom_dimension":{"width":"","height":""},"align":"","align_tablet":"","align_mobile":"","caption_source":"none","caption":"","link_to":"none","link":{"url":"","is_external":"","nofollow":"","custom_attributes":""},"open_lightbox":"default","view":"traditional","width":{"unit":"%","size":"","sizes":[]},"width_tablet":{"unit":"%","size":"","sizes":[]},"width_mobile":{"unit":"%","size":"","sizes":[]},"space":{"unit":"%","size":"","sizes":[]},"space_tablet":{"unit":"%","size":"","sizes":[]},"space_mobile":{"unit":"%","size":"","sizes":[]},"height":{"unit":"px","size":"","sizes":[]},"height_tablet":{"unit":"px","size":"","sizes":[]},"height_mobile":{"unit":"px","size":"","sizes":[]},"object-fit":"","object-fit_tablet":"","object-fit_mobile":"","object-position":"center center","object-position_tablet":"","object-position_mobile":"","opacity":{"unit":"px","size":"","sizes":[]},"css_filters_css_filter":"","css_filters_blur":{"unit":"px","size":0,"sizes":[]},"css_filters_brightness":{"unit":"px","size":100,"sizes":[]},"css_filters_contrast":{"unit":"px","size":100,"sizes":[]},"css_filters_saturate":{"unit":"px","size":100,"sizes":[]},"css_filters_hue":{"unit":"px","size":0,"sizes":[]},"opacity_hover":{"unit":"px","size":"","sizes":[]},"css_filters_hover_css_filter":"","css_filters_hover_blur":{"unit":"px","size":0,"sizes":[]},"css_filters_hover_brightness":{"unit":"px","size":100,"sizes":[]},"css_filters_hover_contrast":{"unit":"px","size":100,"sizes":[]},"css_filters_hover_saturate":{"unit":"px","size":100,"sizes":[]},"css_filters_hover_hue":{"unit":"px","size":0,"sizes":[]},"background_hover_transition":{"unit":"px","size":"","sizes":[]},"hover_animation":"","image_border_border":"","image_border_width":{"unit":"px","top":"","right":"","bottom":"","left":"","isLinked":true},"image_border_width_tablet":{"unit":"px","top":"","right":"","bottom":"","left":"","isLinked":true},"image_border_width_mobile":{"unit":"px","top":"","right":"","bottom":"","left":"","isLinked":true},"image_border_color":"","image_border_radius":{"unit":"px","top":"","right":"","bottom":"","left":"","isLinked":true},"image_border_radius_tablet":{"unit":"px","top":"","right":"","bottom":"","left":"","isLinked":true},"image_border_radius_mobile":{"unit":"px","top":"","right":"","bottom":"","left":"","isLinked":true},"image_box_shadow_box_shadow_type":"","image_box_shadow_box_shadow":{"horizontal":0,"vertical":0,"blur":10,"spread":0,"color":"rgba(0,0,0,0.5)"},"caption_align":"","caption_align_tablet":"","caption_align_mobile":"","text_color":"","caption_background_color":"","caption_typography_typography":"","caption_typography_font_family":"","caption_typography_font_size":{"unit":"px","size":"","sizes":[]},"caption_typography_font_size_tablet":{"unit":"px","size":"","sizes":[]},"caption_typography_font_size_mobile":{"unit":"px","size":"","sizes":[]},"caption_typography_font_weight":"","caption_typography_text_transform":"","caption_typography_font_style":"","caption_typography_text_decoration":"","caption_typography_line_height":{"unit":"px","size":"","sizes":[]},"caption_typography_line_height_tablet":{"unit":"em","size":"","sizes":[]},"caption_typography_line_height_mobile":{"unit":"em","size":"","sizes":[]},"caption_typography_letter_spacing":{"unit":"px","size":"","sizes":[]},"caption_typography_letter_spacing_tablet":{"unit":"px","size":"","sizes":[]},"caption_typography_letter_spacing_mobile":{"unit":"px","size":"","sizes":[]},"caption_typography_word_spacing":{"unit":"px","size":"","sizes":[]},"caption_typography_word_spacing_tablet":{"unit":"em","size":"","sizes":[]},"caption_typography_word_spacing_mobile":{"unit":"em","size":"","sizes":[]},"caption_text_shadow_text_shadow_type":"","caption_text_shadow_text_shadow":{"horizontal":0,"vertical":0,"blur":10,"color":"rgba(0,0,0,0.3)"},"caption_space":{"unit":"px","size":"","sizes":[]},"caption_space_tablet":{"unit":"px","size":"","sizes":[]},"caption_space_mobile":{"unit":"px","size":"","sizes":[]},"_title":"","_margin":{"unit":"px","top":"","right":"","bottom":"","left":"","isLinked":true},"_margin_tablet":{"unit":"px","top":"","right":"","bottom":"","left":"","isLinked":true},"_margin_mobile":{"unit":"px","top":"","right":"","bottom":"","left":"","isLinked":true},"_padding":{"unit":"px","top":"","right":"","bottom":"","left":"","isLinked":true},"_padding_tablet":{"unit":"px","top":"","right":"","bottom":"","left":"","isLinked":true},"_padding_mobile":{"unit":"px","top":"","right":"","bottom":"","left":"","isLinked":true},"_element_width":"","_element_width_tablet":"","_element_width_mobile":"","_element_custom_width":{"unit":"%","size":"","sizes":[]},"_element_custom_width_tablet":{"unit":"px","size":"","sizes":[]},"_element_custom_width_mobile":{"unit":"px","size":"","sizes":[]},"_element_vertical_align":"","_element_vertical_align_tablet":"","_element_vertical_align_mobile":"","_position":"","_offset_orientation_h":"start","_offset_x":{"unit":"px","size":"0","sizes":[]},"_offset_x_tablet":{"unit":"px","size":"","sizes":[]},"_offset_x_mobile":{"unit":"px","size":"","sizes":[]},"_offset_x_end":{"unit":"px","size":"0","sizes":[]},"_offset_x_end_tablet":{"unit":"px","size":"","sizes":[]},"_offset_x_end_mobile":{"unit":"px","size":"","sizes":[]},"_offset_orientation_v":"start","_offset_y":{"unit":"px","size":"0","sizes":[]},"_offset_y_tablet":{"unit":"px","size":"","sizes":[]},"_offset_y_mobile":{"unit":"px","size":"","sizes":[]},"_offset_y_end":{"unit":"px","size":"0","sizes":[]},"_offset_y_end_tablet":{"unit":"px","size":"","sizes":[]},"_offset_y_end_mobile":{"unit":"px","size":"","sizes":[]},"_z_index":"","_z_index_tablet":"","_z_index_mobile":"","_element_id":"","_css_classes":"","element_parallax":"","scroll_x":0,"scroll_y":-80,"scroll_z":0,"scroll_smoothness":"30","wd_animation":"","wd_animation_duration":"normal","wd_animation_delay":100,"_animation":"","_animation_tablet":"","_animation_mobile":"","animation_duration":"","_animation_delay":"","_transform_rotate_popover":"","_transform_rotateZ_effect":{"unit":"px","size":"","sizes":[]},"_transform_rotateZ_effect_tablet":{"unit":"deg","size":"","sizes":[]},"_transform_rotateZ_effect_mobile":{"unit":"deg","size":"","sizes":[]},"_transform_rotate_3d":"","_transform_rotateX_effect":{"unit":"px","size":"","sizes":[]},"_transform_rotateX_effect_tablet":{"unit":"deg","size":"","sizes":[]},"_transform_rotateX_effect_mobile":{"unit":"deg","size":"","sizes":[]},"_transform_rotateY_effect":{"unit":"px","size":"","sizes":[]},"_transform_rotateY_effect_tablet":{"unit":"deg","size":"","sizes":[]},"_transform_rotateY_effect_mobile":{"unit":"deg","size":"","sizes":[]},"_transform_perspective_effect":{"unit":"px","size":"","sizes":[]},"_transform_perspective_effect_tablet":{"unit":"px","size":"","sizes":[]},"_transform_perspective_effect_mobile":{"unit":"px","size":"","sizes":[]},"_transform_translate_popover":"","_transform_translateX_effect":{"unit":"px","size":"","sizes":[]},"_transform_translateX_effect_tablet":{"unit":"px","size":"","sizes":[]},"_transform_translateX_effect_mobile":{"unit":"px","size":"","sizes":[]},"_transform_translateY_effect":{"unit":"px","size":"","sizes":[]},"_transform_translateY_effect_tablet":{"unit":"px","size":"","sizes":[]},"_transform_translateY_effect_mobile":{"unit":"px","size":"","sizes":[]},"_transform_scale_popover":"","_transform_keep_proportions":"yes","_transform_scale_effect":{"unit":"px","size":"","sizes":[]},"_transform_scale_effect_tablet":{"unit":"px","size":"","sizes":[]},"_transform_scale_effect_mobile":{"unit":"px","size":"","sizes":[]},"_transform_scaleX_effect":{"unit":"px","size":"","sizes":[]},"_transform_scaleX_effect_tablet":{"unit":"px","size":"","sizes":[]},"_transform_scaleX_effect_mobile":{"unit":"px","size":"","sizes":[]},"_transform_scaleY_effect":{"unit":"px","size":"","sizes":[]},"_transform_scaleY_effect_tablet":{"unit":"px","size":"","sizes":[]},"_transform_scaleY_effect_mobile":{"unit":"px","size":"","sizes":[]},"_transform_skew_popover":"","_transform_skewX_effect":{"unit":"px","size":"","sizes":[]},"_transform_skewX_effect_tablet":{"unit":"deg","size":"","sizes":[]},"_transform_skewX_effect_mobile":{"unit":"deg","size":"","sizes":[]},"_transform_skewY_effect":{"unit":"px","size":"","sizes":[]},"_transform_skewY_effect_tablet":{"unit":"deg","size":"","sizes":[]},"_transform_skewY_effect_mobile":{"unit":"deg","size":"","sizes":[]},"_transform_flipX_effect":"","_transform_flipY_effect":"","_transform_rotate_popover_hover":"","_transform_rotateZ_effect_hover":{"unit":"px","size":"","sizes":[]},"_transform_rotateZ_effect_hover_tablet":{"unit":"deg","size":"","sizes":[]},"_transform_rotateZ_effect_hover_mobile":{"unit":"deg","size":"","sizes":[]},"_transform_rotate_3d_hover":"","_transform_rotateX_effect_hover":{"unit":"px","size":"","sizes":[]},"_transform_rotateX_effect_hover_tablet":{"unit":"deg","size":"","sizes":[]},"_transform_rotateX_effect_hover_mobile":{"unit":"deg","size":"","sizes":[]},"_transform_rotateY_effect_hover":{"unit":"px","size":"","sizes":[]},"_transform_rotateY_effect_hover_tablet":{"unit":"deg","size":"","sizes":[]},"_transform_rotateY_effect_hover_mobile":{"unit":"deg","size":"","sizes":[]},"_transform_perspective_effect_hover":{"unit":"px","size":"","sizes":[]},"_transform_perspective_effect_hover_tablet":{"unit":"px","size":"","sizes":[]},"_transform_perspective_effect_hover_mobile":{"unit":"px","size":"","sizes":[]},"_transform_translate_popover_hover":"","_transform_translateX_effect_hover":{"unit":"px","size":"","sizes":[]},"_transform_translateX_effect_hover_tablet":{"unit":"px","size":"","sizes":[]},"_transform_translateX_effect_hover_mobile":{"unit":"px","size":"","sizes":[]},"_transform_translateY_effect_hover":{"unit":"px","size":"","sizes":[]},"_transform_translateY_effect_hover_tablet":{"unit":"px","size":"","sizes":[]},"_transform_translateY_effect_hover_mobile":{"unit":"px","size":"","sizes":[]},"_transform_scale_popover_hover":"","_transform_keep_proportions_hover":"yes","_transform_scale_effect_hover":{"unit":"px","size":"","sizes":[]},"_transform_scale_effect_hover_tablet":{"unit":"px","size":"","sizes":[]},"_transform_scale_effect_hover_mobile":{"unit":"px","size":"","sizes":[]},"_transform_scaleX_effect_hover":{"unit":"px","size":"","sizes":[]},"_transform_scaleX_effect_hover_tablet":{"unit":"px","size":"","sizes":[]},"_transform_scaleX_effect_hover_mobile":{"unit":"px","size":"","sizes":[]},"_transform_scaleY_effect_hover":{"unit":"px","size":"","sizes":[]},"_transform_scaleY_effect_hover_tablet":{"unit":"px","size":"","sizes":[]},"_transform_scaleY_effect_hover_mobile":{"unit":"px","size":"","sizes":[]},"_transform_skew_popover_hover":"","_transform_skewX_effect_hover":{"unit":"px","size":"","sizes":[]},"_transform_skewX_effect_hover_tablet":{"unit":"deg","size":"","sizes":[]},"_transform_skewX_effect_hover_mobile":{"unit":"deg","size":"","sizes":[]},"_transform_skewY_effect_hover":{"unit":"px","size":"","sizes":[]},"_transform_skewY_effect_hover_tablet":{"unit":"deg","size":"","sizes":[]},"_transform_skewY_effect_hover_mobile":{"unit":"deg","size":"","sizes":[]},"_transform_flipX_effect_hover":"","_transform_flipY_effect_hover":"","_transform_transition_hover":{"unit":"px","size":"","sizes":[]},"motion_fx_transform_x_anchor_point":"","motion_fx_transform_x_anchor_point_tablet":"","motion_fx_transform_x_anchor_point_mobile":"","motion_fx_transform_y_anchor_point":"","motion_fx_transform_y_anchor_point_tablet":"","motion_fx_transform_y_anchor_point_mobile":"","_background_background":"","_background_color":"","_background_color_stop":{"unit":"%","size":0,"sizes":[]},"_background_color_b":"#f2295b","_background_color_b_stop":{"unit":"%","size":100,"sizes":[]},"_background_gradient_type":"linear","_background_gradient_angle":{"unit":"deg","size":180,"sizes":[]},"_background_gradient_position":"center center","_background_image":{"url":"","id":"","size":""},"_background_image_tablet":{"url":"","id":"","size":""},"_background_image_mobile":{"url":"","id":"","size":""},"_background_position":"","_background_position_tablet":"","_background_position_mobile":"","_background_xpos":{"unit":"px","size":0,"sizes":[]},"_background_xpos_tablet":{"unit":"px","size":0,"sizes":[]},"_background_xpos_mobile":{"unit":"px","size":0,"sizes":[]},"_background_ypos":{"unit":"px","size":0,"sizes":[]},"_background_ypos_tablet":{"unit":"px","size":0,"sizes":[]},"_background_ypos_mobile":{"unit":"px","size":0,"sizes":[]},"_background_attachment":"","_background_repeat":"","_background_repeat_tablet":"","_background_repeat_mobile":"","_background_size":"","_background_size_tablet":"","_background_size_mobile":"","_background_bg_width":{"unit":"%","size":100,"sizes":[]},"_background_bg_width_tablet":{"unit":"px","size":"","sizes":[]},"_background_bg_width_mobile":{"unit":"px","size":"","sizes":[]},"_background_video_link":"","_background_video_start":"","_background_video_end":"","_background_play_once":"","_background_play_on_mobile":"","_background_privacy_mode":"","_background_video_fallback":{"url":"","id":"","size":""},"_background_slideshow_gallery":[],"_background_slideshow_loop":"yes","_background_slideshow_slide_duration":5000,"_background_slideshow_slide_transition":"fade","_background_slideshow_transition_duration":500,"_background_slideshow_background_size":"","_background_slideshow_background_size_tablet":"","_background_slideshow_background_size_mobile":"","_background_slideshow_background_position":"","_background_slideshow_background_position_tablet":"","_background_slideshow_background_position_mobile":"","_background_slideshow_lazyload":"","_background_slideshow_ken_burns":"","_background_slideshow_ken_burns_zoom_direction":"in","_background_hover_background":"","_background_hover_color":"","_background_hover_color_stop":{"unit":"%","size":0,"sizes":[]},"_background_hover_color_b":"#f2295b","_background_hover_color_b_stop":{"unit":"%","size":100,"sizes":[]},"_background_hover_gradient_type":"linear","_background_hover_gradient_angle":{"unit":"deg","size":180,"sizes":[]},"_background_hover_gradient_position":"center center","_background_hover_image":{"url":"","id":"","size":""},"_background_hover_image_tablet":{"url":"","id":"","size":""},"_background_hover_image_mobile":{"url":"","id":"","size":""},"_background_hover_position":"","_background_hover_position_tablet":"","_background_hover_position_mobile":"","_background_hover_xpos":{"unit":"px","size":0,"sizes":[]},"_background_hover_xpos_tablet":{"unit":"px","size":0,"sizes":[]},"_background_hover_xpos_mobile":{"unit":"px","size":0,"sizes":[]},"_background_hover_ypos":{"unit":"px","size":0,"sizes":[]},"_background_hover_ypos_tablet":{"unit":"px","size":0,"sizes":[]},"_background_hover_ypos_mobile":{"unit":"px","size":0,"sizes":[]},"_background_hover_attachment":"","_background_hover_repeat":"","_background_hover_repeat_tablet":"","_background_hover_repeat_mobile":"","_background_hover_size":"","_background_hover_size_tablet":"","_background_hover_size_mobile":"","_background_hover_bg_width":{"unit":"%","size":100,"sizes":[]},"_background_hover_bg_width_tablet":{"unit":"px","size":"","sizes":[]},"_background_hover_bg_width_mobile":{"unit":"px","size":"","sizes":[]},"_background_hover_video_link":"","_background_hover_video_start":"","_background_hover_video_end":"","_background_hover_play_once":"","_background_hover_play_on_mobile":"","_background_hover_privacy_mode":"","_background_hover_video_fallback":{"url":"","id":"","size":""},"_background_hover_slideshow_gallery":[],"_background_hover_slideshow_loop":"yes","_background_hover_slideshow_slide_duration":5000,"_background_hover_slideshow_slide_transition":"fade","_background_hover_slideshow_transition_duration":500,"_background_hover_slideshow_background_size":"","_background_hover_slideshow_background_size_tablet":"","_background_hover_slideshow_background_size_mobile":"","_background_hover_slideshow_background_position":"","_background_hover_slideshow_background_position_tablet":"","_background_hover_slideshow_background_position_mobile":"","_background_hover_slideshow_lazyload":"","_background_hover_slideshow_ken_burns":"","_background_hover_slideshow_ken_burns_zoom_direction":"in","_background_hover_transition":{"unit":"px","size":"","sizes":[]},"_border_border":"","_border_width":{"unit":"px","top":"","right":"","bottom":"","left":"","isLinked":true},"_border_width_tablet":{"unit":"px","top":"","right":"","bottom":"","left":"","isLinked":true},"_border_width_mobile":{"unit":"px","top":"","right":"","bottom":"","left":"","isLinked":true},"_border_color":"","_border_radius":{"unit":"px","top":"","right":"","bottom":"","left":"","isLinked":true},"_border_radius_tablet":{"unit":"px","top":"","right":"","bottom":"","left":"","isLinked":true},"_border_radius_mobile":{"unit":"px","top":"","right":"","bottom":"","left":"","isLinked":true},"_box_shadow_box_shadow_type":"","_box_shadow_box_shadow":{"horizontal":0,"vertical":0,"blur":10,"spread":0,"color":"rgba(0,0,0,0.5)"},"_box_shadow_box_shadow_position":" ","_border_hover_border":"","_border_hover_width":{"unit":"px","top":"","right":"","bottom":"","left":"","isLinked":true},"_border_hover_width_tablet":{"unit":"px","top":"","right":"","bottom":"","left":"","isLinked":true},"_border_hover_width_mobile":{"unit":"px","top":"","right":"","bottom":"","left":"","isLinked":true},"_border_hover_color":"","_border_radius_hover":{"unit":"px","top":"","right":"","bottom":"","left":"","isLinked":true},"_border_radius_hover_tablet":{"unit":"px","top":"","right":"","bottom":"","left":"","isLinked":true},"_border_radius_hover_mobile":{"unit":"px","top":"","right":"","bottom":"","left":"","isLinked":true},"_box_shadow_hover_box_shadow_type":"","_box_shadow_hover_box_shadow":{"horizontal":0,"vertical":0,"blur":10,"spread":0,"color":"rgba(0,0,0,0.5)"},"_box_shadow_hover_box_shadow_position":" ","_border_hover_transition":{"unit":"px","size":"","sizes":[]},"_mask_switch":"","_mask_shape":"circle","_mask_image":{"url":"","id":"","size":""},"_mask_notice":"","_mask_size":"contain","_mask_size_tablet":"","_mask_size_mobile":"","_mask_size_scale":{"unit":"%","size":100,"sizes":[]},"_mask_size_scale_tablet":{"unit":"px","size":"","sizes":[]},"_mask_size_scale_mobile":{"unit":"px","size":"","sizes":[]},"_mask_position":"center center","_mask_position_tablet":"","_mask_position_mobile":"","_mask_position_x":{"unit":"%","size":0,"sizes":[]},"_mask_position_x_tablet":{"unit":"px","size":"","sizes":[]},"_mask_position_x_mobile":{"unit":"px","size":"","sizes":[]},"_mask_position_y":{"unit":"%","size":0,"sizes":[]},"_mask_position_y_tablet":{"unit":"px","size":"","sizes":[]},"_mask_position_y_mobile":{"unit":"px","size":"","sizes":[]},"_mask_repeat":"no-repeat","_mask_repeat_tablet":"","_mask_repeat_mobile":"","hide_desktop":"","hide_tablet":"","hide_mobile":""},"defaultEditSettings":{"defaultEditRoute":"content"},"elements":[],"widgetType":"image","editSettings":{"defaultEditRoute":"content","panel":{"activeTab":"content","activeSection":"section_image"}}}]}](https://chocolate-mosquito-657420.hostingersite.com/wp-content/uploads/2023/09/1693891333554.png)